Don't waste waste: re-use for a better world

Archive for March, 2013

Pop can tab bracelet

Pop tab bracelet 9

Now it’s time for a mixed materials craft! This bracelet is made out of aluminium pop can tabs and strips from an old sheet. Here are some facts about aluminium and the benefits of recycling and re-using it:
Aluminium is produced from bauxite, a near-surface ore extracted using open cast mining (a process which causes soil erosion). Bauxite is mainly found around the equator, and rainforest (especially in Brazil) can be destroyed in the mining process. Aluminium production also generates “red mud”, a caustic mix of chemicals which pollutes surface and ground water if left untreated.

“Fun” (and sometimes worrying) facts:
– Worldwide, the aluminium industry uses as much electric power as the entire continent of Africa.
– Recycling one(!) aluminium can saves enough energy to run a television for three hours or a 100 Watt light bulb for 20 hours.
– Recycling aluminium saves 95% of energy and 95% of carbon dioxide emissions compared to new producing it.
– Four tons of bauxite are required to produce one ton of aluminium.
– An aluminium can can be back on the supermarket shelves within six weeks after it was collected for recycling.

Source: Hanaor C. & Howells T. (2010) “Recycle the Essential Guide” Black Dog Publishing Limited

Pop tab bracelet 0

The materials you will need for this craft are: Pop can tabs (quite a few of them), string, ribbons or (because re-using is teh main point of it) strips of textiles, for example from a sheet that you’re no longer using. Estimated time needed: about 15 minutes to make one bracelet.

Pop tab bracelet 1-4

1. Place one pop can tab partly on top of another. Pull the string or ribbon through the opening as shown by the arrow.
2. Place a third pop can tab next to the first one. A pattern with the first tab below, the next above, the third below and so on should emerge.
3. Pull the string through the new opening.
4. Place a fourth tab according to the every-second-above-and-below pattern and pull the string through the new opening just like before.

Pop tab bracelet 5-8

5 & 6. Continue in the same way as in steps 2-4 until the chain of pop can tabs is long enough to fit around your wrist.
7. Pull a second string through the bottom row of overlapping holes.
8. Bend the chain into a circle (around your wrist if you’re planning to wear it) and tie it together with bowknots.

_MG_0492

_MG_0496

T-shirt bag

This tutorial shows re-using at it’s best: a t-shirt transformed into a bag using no other materials than the t-shirt itself! There’s not even sewing involved, and the only tools you need are scissors and a safety pin. So when I first spotted this craft at: http://www.leethal.net/zine/?p=1344 I knew that I had to make one myself. Here’s how you do it:

T-shirt bag 1-4

1. Grab a t-shirt that you’re tried of or just can’t use anymore. Preferably it should be in quite good condition so that you’re bag doesn’t fall apart.
2 & 3. Cut of the sleeves.
4. From the pieces that you’ve cut off, cut out strips of fabric (see step 5).

T-shirt bag 5-8

5. Pull at the strips to make them curl up.
6 & 7. Cut one or several slits (I made two) in the hem at the bottom of the T-shirt, but make sure that you don’t cut through the seam. If you make several slits, space them evenly around the bottom of the t-shirt.
8. Attach the safety pin to one of your strips.

T-shirt bag 9-12

9. With the help of the safety pin, pull the strip through the hem, starting at the slit that you made.
10. Tie it together tightly to create a small circle. This will be the bottom of your bag.
11. If you made more than one slit, repeat until all of the hem is tied up.
12. Ta da!

Jeans pillowcase

Clothes can be a big problem for someone who wants to lead an environmentally friendly life, because even if they are your size, whole and clean, you might not want to wear them. Why? Because they are not fashionable, or simply not to your liking. This is called perceived obsolescence, and what it means is that you perceive your clothes as unusable and worthless even though they’re not. Because fashion changes quickly and often, we consume clothes more rapidly than we would have if the only criteria for a nice garment would have been its size and condition. But perceived obsolescence is not real obsolescence and the clothes that we throw away because they’re out of style are still valuable and useful. All it takes is to see beyond the illusion of worthlessness that fashion builds for us. With some creativity you can give garments that you no longer like new life, either as another outfit, or as something completely else – like a pillowcase!

This is a tutorial for a pillowcase made out of scrap pieces of jeans, so for this craft your old pants don’t even have to be whole – you simply cut out strips from where they are. If you get left over pieces that are too small to be used in another project, you can recycle them just like with other materials. Recycled textiles can become everything from furniture stuffing to car insulation. But don’t forget that just because you find your clothes unfashionable and want to make pillowcases out of them, not everybody might. If your clothes are in good condition, try exchanging them with your friends or giving them to a second hand shop before you start cutting them to pieces. Here’s a small rhyme for you: The more we re-use, the less we have to new-produce. Happy re-using!

Pillowcase tutorial 0

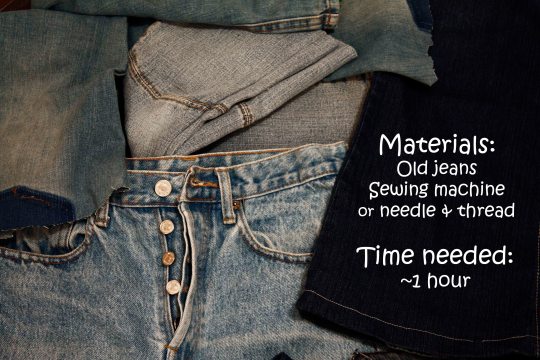
For this craft you will need: Jeans that you can’t or don’t want to wear any longer (preferably several ones with different colour tones), something to sew with (I used a sewing machine), scissors and other pieces of textiles if you want to make the backside in a different material, like I did. I used an old sheet.
You should count on spending at least an hour with this craft, and possibly more depending on how skilled you are at sewing.

Pillowcase tutorial 1-4

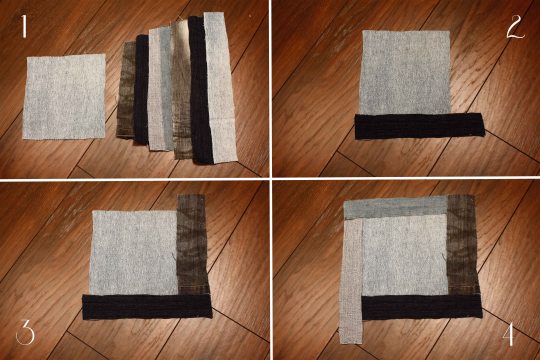
1. Cut out a square piece of jeans as well as strips of increasing length. The shortest one should be slightly longer than the sides of the square (the bit sticking out should be slightly longer than the width of the next strip). Always make the pieces a bit larger than you want them, because some of the material will become hidden when you sew the pieces together.
2. PLace one of the strips next to the square.
3. Place the next strip so that it fits in the corner made by the next side of the square and the piece of the previous strip that’s sticking out. This strip should also be longer than the side of the square.
4. Continue all around the square, letting the last strip stick out past both the square and the first strip.

Pillowcase tutorial 5-8

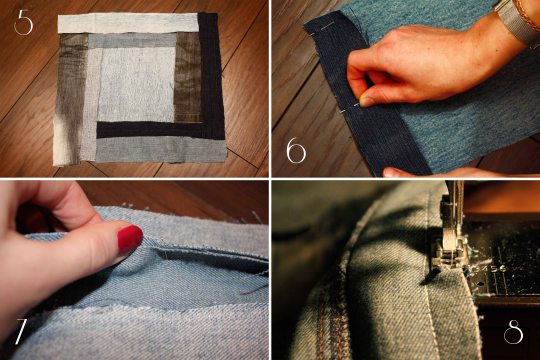
5. Continue in this manner until the new square formed by the square piece and the strips is slightly larger than the pillow on which you plan to use it. (Remember that it will shrink in size as you sew it together).
6 & 7. Start pinning the pieces together, placing the ‘upper’ sides (the ones you want to see in the end) against each other.
8. Sew it all together. In the end you might have to add more strips or cut away parts until you get a nice square of the correct size. It should still be slightly bigger than the actual pillow, so that it doesn’t become too small when sewn together with the back part.

Pillowcase tutorial 9-12

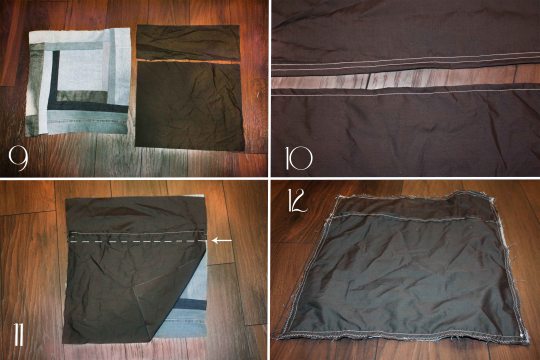
9. Now it’s time to make the back side of the pillowcase. If you want something simple, you can just cut out a piece of cloth equally large as the front side and sew them together upper side against upper side. But then you have to leave one side open so that you can turn it inside out and put the pillow in before sewing the last part, and you won’t be able to change the pillowcase without opening the seams. I decided to instead make a back side out of two pieces of textile that overlap, which enables you to both sew the entire thing together turned inside out (you get invisible seams all around) and switch pillowcase later if you feel like it.
Cut out two pieces of cloth (for example from an old sheet) that are equally wide as the front side, but shorter. Together they should be longer than the front side, so that if you put them on top of it they overlap. I made one longer than the other so that the opening of the pillowcase isn’t in the middle of the back side, but rather three quarters of the way up.
10. Sew the edges of the pieces of sheet that will be free (the edges of the parts where they will overlap) so that they don’t fray.
11. Place the back side pieces ‘upper’ side down on top of the front side (the sides that you want facing outwards on the finished pillowcase should now be facing each other). Make sure that the back side pieces overlap (as illustrated by the arrow and the dotted line in the picture).
12. Pin the pieces together and then sew all around. Then turn the pillowcase inside out using the opening created by the overlapping back side pieces.

Pillowcase tutorial 13

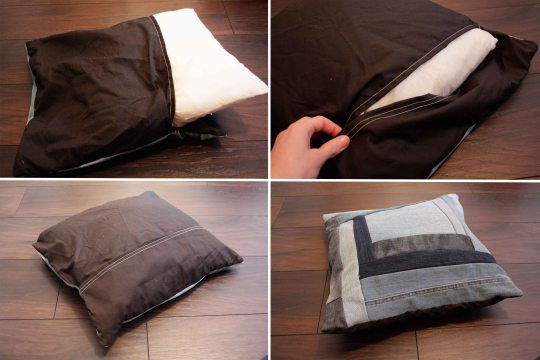
Place a cushion inside your pillowcase and hide the opening at the back. (If it wants to open at the back you can place a button from one of your jeans pairs on the inner backside piece and make a buttonhole on the outer. That will both keep the backside closed and be a nice decoration.)

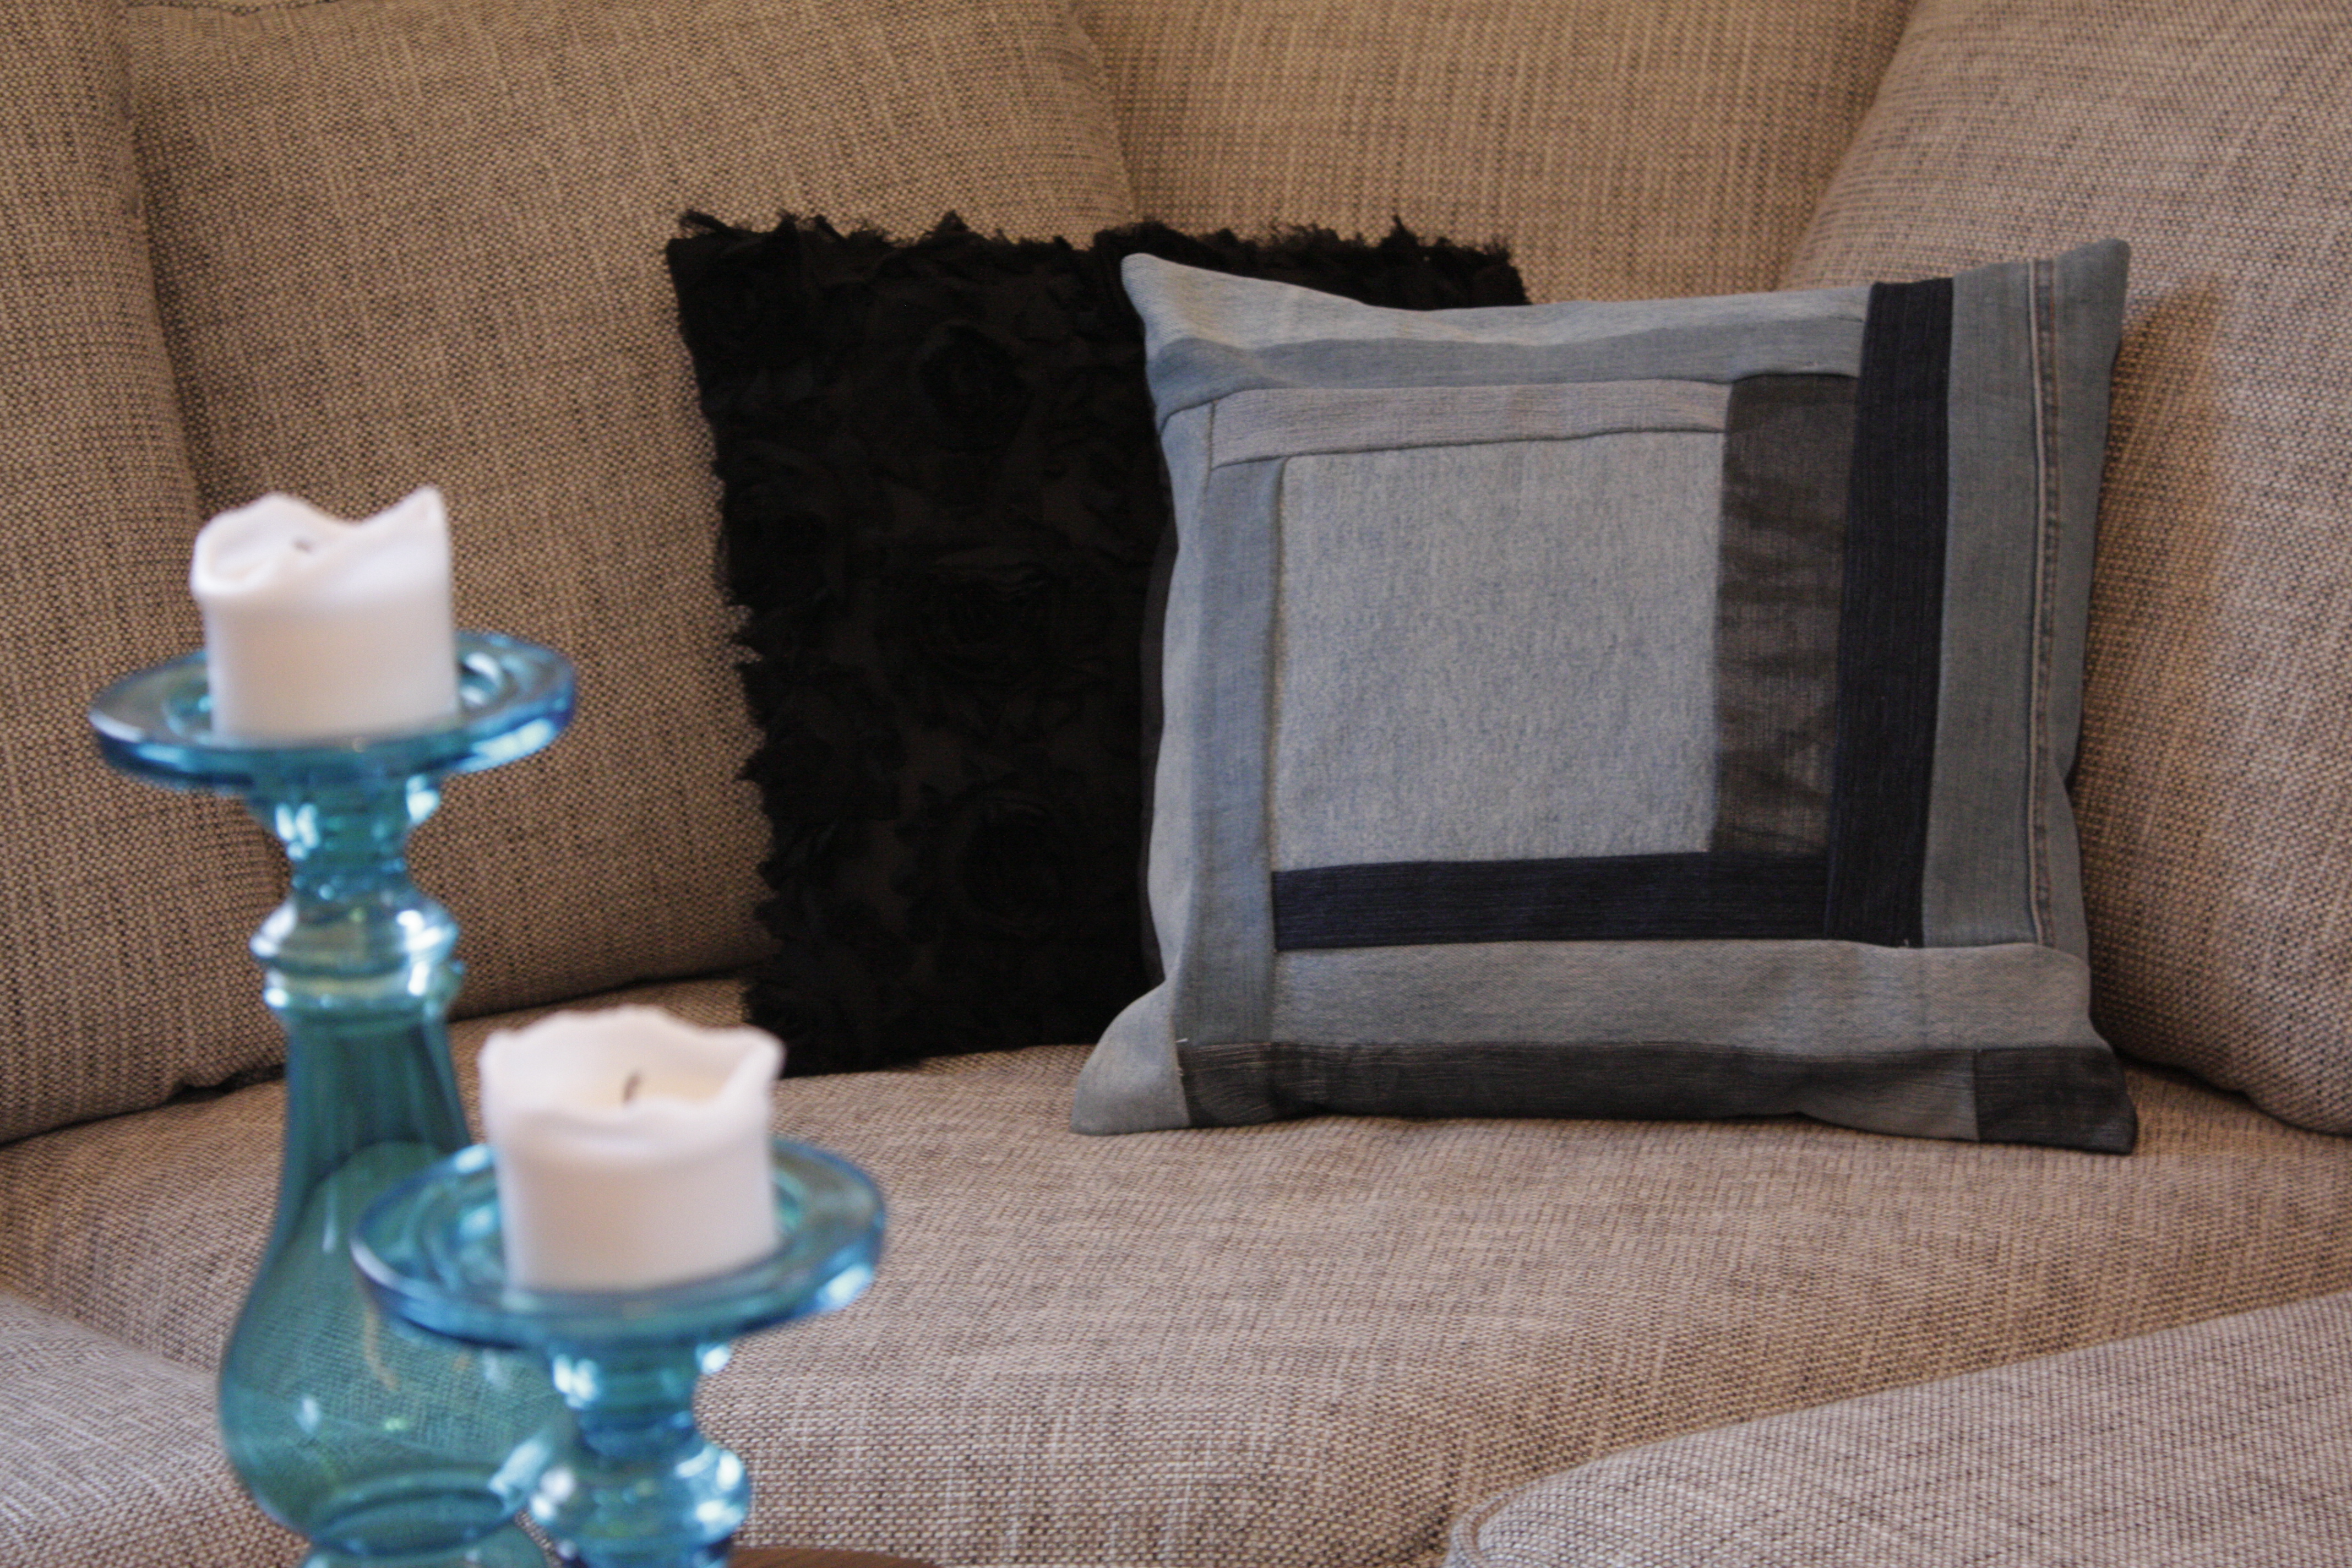
This is the finished result of my jeans pillowcase:

_MG_0332

Shifting focus

I hope you have enjoyed the section on re-used paper, and that the crafts have inspired you to, if not re-use, at least recycle your “waste” paper. The citation marks are there because, really, there is no such thing as waste. Something which does not seem very valuable may become so again by re-using, and things that are no longer useful to you can get new life if they are recycled. This is of course true for many materials – not only paper – which is why it has become time to switch focus here on World of Scrap. The next area of attention is textiles! Just to provide you with some basic info, here are some “fun” facts regarding our consumption of textiles in the world. (Source: Naturskyddsföreningen http://www.naturskyddsforeningen.se/gron-guide/kopa/klader-och-textil/textilfakta/
Reviewed 23-11-2012. (I apologize for using a non-English source))

– In making 1 kg of fabric, an average of 1 kg of chemicals is used.
– The same kilogram of fabric also requires about 350 liters of water in the production process.
– In Sweden we buy 24 kilograms of textiles per person and year. That fits into six washing machines.

And some motivation to recycle and re-use your textiles (facts from http://dl.dropbox.com/u/21130258/resources/InformationSheets/Textiles.htm).
Recycling textiles saves both energy and water, and the latter is of great importance because new-production of textiles from natural fibers (mainly cotton) uses extreme amounts of water both during cultivation and later processing. Massive irrigation of this sort can have equally large consequences, as for example the drying out of the Aral Sea.
Re-using textiles is also good because it reduces the need for landfills. Synthetic fibers that do not decompose require a lot of landfill space, and woolen garments that do decay produce methane which contributes negatively to the greenhouse effect and thereby global warming. Re-using textiles reduces both of these issues. Re-cycled cloths also require less chemicals and dyes than virgin textiles. To this can be added the reduced pressure on the environment caused by shipping the raw materials and finished textiles around the world before they reach their destination – your home.

Making an effort for the environment doesn’t have to be difficult and boring. Follow the tutorials here on World of Scrap or find inspiration on the internet to re-use your “waste” and make something original and beautiful. Don’t waste waste – DIY for a better (greener) world.